CE Expiration Date: June 10, 2024
CEU (Continuing Education Unit):2 Credit(s)
AGD Code: 070
Educational aims and objectives
This self-instructional course for dentists aims to describe the key points to achieving excellent results in initial nonsurgical endodontic treatment in the key areas of diagnosis, shaping, irrigation, obturation, and restoration.
Expected outcomes
Endodontic Practice US subscribers can answer the CE questions by taking the quiz online to earn 2 hours of CE from reading this article. Correctly answering the questions will demonstrate the reader can:
- Identify preplanning procedures.
- Realize some efficient anesthesia options.
- Identify the benefits of CBCT for managing complex anatomy.
- Discover a variety of instrumentation systems.
- Identify various methods of efficient irrigation.
Drs. Brett E. Gilbert and Richard Mounce describe non-surgical endodontic treatment techniques and strategies that can lead to treatment success.
Drs. Brett E. Gilbert and Richard Mounce discuss techniques and materials that lead to effective endodontic treatment
This article was written to demonstrate that the application of proven literature and/or evidence-based endodontic principles leads to excellent clinical results, irrespective of the materials used. We will describe the key points to achieving excellent results in initial nonsurgical endodontic treatment in the key areas of diagnosis, shaping, irrigation, obturation, and restoration.
Assessing “proven” and “literature/evidence-based” techniques and materials is easier said than done. While a number of excellent endodontic meta-analysis and systematic reviews have been completed in the recent scientific literature, not many high-level studies can definitively validate a number of key treatment strategies. For example, we cannot prove by high-level studies that warm obturation is better than cold lateral condensation, nor can we prove that activated irrigation is superior to passive cold irrigation, among the host of other such clinical questions.
However, lower levels of evidence in studies certainly lead us to adopt new techniques, but without the confidence that the efficacy can be proven without doubt to be an improvement over older techniques. An example is a study by Gutarts, et al., 2005, that showed that 1 minute of ultrasonic activation of irrigant solution resulted in significantly cleaner canals histologically in the mesial root of mandibular molars. This is a low level of evidence (in vivo/ex vivo, low N) but certainly compelling and a valid justification to adopt the technique.1 We will incorporate many of these references, but we want to emphasize that Level 1 studies are not in place to validate these techniques to the highest possible evidence levels.
The preceding notwithstanding, regardless of philosophies and corporate relationships, it is the overwhelming preference of endodontists globally to use warm obturation techniques and activated irrigation. (Concepts discussed in greater detail follow.) Specialist preferences also are hedged by the “eyeball test” and the visual evidence that is observed in treatment in comparison to prior techniques. Hence, this article will focus on key technique objectives that universally are agreed upon.
As a starting place, before ever picking up a syringe, the two single greatest ingredients to creating excellent endodontic results are time and comprehensive treatment planning. It is essential that the clinician has enough time to carry out the treatment in a relaxed but productive environment — in essence, practicing with high efficiency.
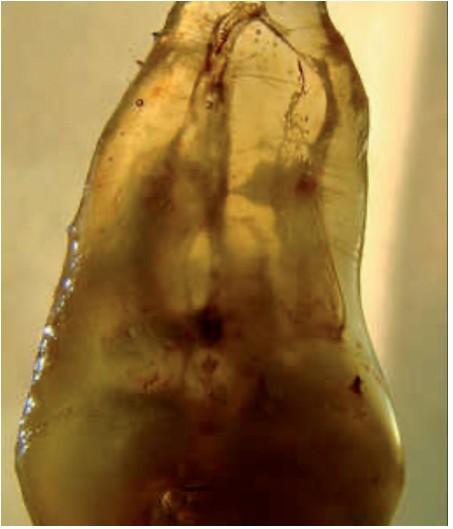
All procedures must be carefully preplanned. Such treatment planning includes performing high-level imaging and a thorough clinical examination to determine a definitive diagnosis. Preoperative treatment planning includes informed consent, assurance of restorability, profound pain control (local anesthesia), visualization and magnification (surgical microscopes), instrumentation (stainless and nickel titanium), irrigation and disinfection protocols, obturation, and coronal seal strategies prior to endodontic access. A lack of treatment-planning strategies is the harbinger of endodontic mis-adventure (Figures 1-3).
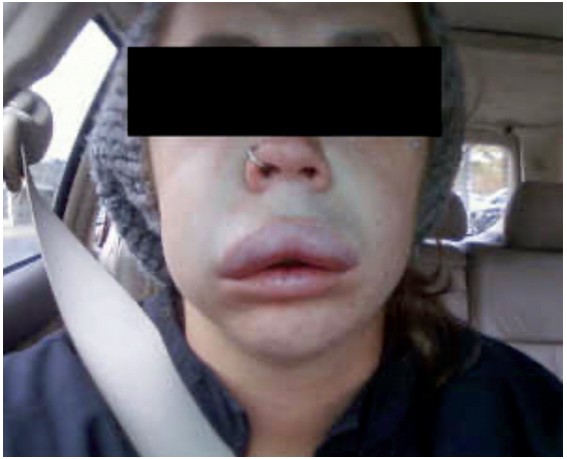
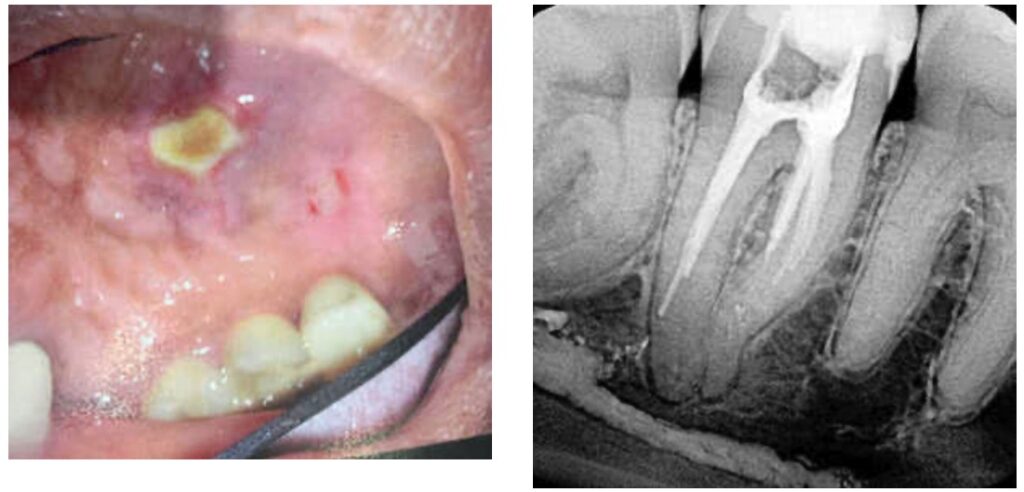
While a discussion of each principle-driven step required in a first-time endodontic procedure would fill a textbook, there are a number of key features of well-treated cases that are showcased in this article. (Please see the caption that accompanies each case and describes its application of the principles discussed.)
As a starting place, assuming a thorough examination and indication for treatment in addition to detailed informed consent, the most difficult gateway to comfortable patient treatment is anesthesia for the “hot lower molar.” Fluency with the Gow Gates injection as well as intraosseous anesthesia (X-Tip, Dentsply) will in large measure eliminate shortcomings in anesthesia when standard block injections do not profoundly anesthetize an anxious patient with a severely inflamed pulp.
Imaging and visualization
Managing complex anatomy is much simpler if the clinician has a preoperative road map. The CBCT provides the road map, and the surgical microscope provides the lens (literally) for visualization of the anatomy. Aside from a relaxed patient who is profoundly numb, being able to visualize anatomy by taking a preoperative (and possibly intraoperative) using CBCT scanning and a surgical microscope during treatment has no substitutes. They are the current “gold standard.” 3D imaging shows the clinician the true reality of a clinical situation as opposed to the suggestion gained from a 2D radiograph. Proper interpretation of imaging prior to and/or during endodontic treatment goes a long way in taking the guesswork out of identifying canal location and other anatomical complexities as the procedure unfolds. In a 2014 study by El Fayad and Johnson, it was determined that when having a preoperative CBCT as compared to 2D radiographs alone, the treatment plan was modified 62% of the time. This is a huge game changer to realize that the information learned from 3D imaging changed the treatment plan more than 6 times out of 10 (Figure 4).2
While many preoperative clinical features need to be considered prior to starting treatment, the key preoperative decision points are the patients’ medical and dental history, their anxiety level, the position of the tooth, space limitations to reaching the tooth, and the canal anatomy. A wide-open canal on tooth No. 9 can be immensely difficult on a noncompliant patient. Alternatively, a distal lingually inclined upper right second molar on a relaxed patient without access limitations and distinct canals can be relatively straightforward, especially for a right-handed clinician using a surgical microscope. In any event, it is incumbent on the clinician to assess every aspect of the case prior to initiating treatment and to give the patient a detailed assessment of what treatment is being recommended.
Access should be big enough to allow visual and tactile control, but not so large as to structurally weaken the tooth. Only as much dentin as required to allow adequate cleaning and shaping should be removed, but no more with effort being expended to always debride the tissue from the pulp horns and other hidden anatomy within the coronal portion of the tooth. Neelakantan, et al., 2018, determined that orifice-directed dentin conservation access design (ninja access) had significantly compromised debridement of the pulp chamber. Therefore, common sense is the best guideline when access design is considered, assuring that the pulp chamber and all pulp horns are debrided.3
Instrumentation
Generally, tooth anatomy indicates how much time will be required using hand files for canal negotiation, especially with calcified canals. Calcification requires fluency with ultrasonics to know which tips and units are required to allow the clinician to remove restrictive dentin. For example, in a C-shaped lower second molar, using a bur in the furcation predisposes the canal to a future fracture. Alternatively, using the appropriate ultrasonic tip preserves tooth structure and allows a precise removal of tooth structure.
There are literally dozens of instrumentation systems available globally at this time. One author uses the Twisted File (KaVo Kerr) (BG) and the other Bassi Logic™ (Bassi Endo) (RM). This notwithstanding, the goals of canal shaping are identical regardless of the instrumentation system used — patency is always sought during canal scouting and instrumentation. Clinicians can debate the relative merits of reciprocation versus rotary motion, optimal Af temperatures (austenite transformation temperatures that control whether a file undergoes the martensitic transformation), controlled memory files ground by CNC machines versus twisting nickel titanium in R phase, along with a multitude of different similar clinical issues. Regardless of these nuances, it is the adherence to basic principles of canal preparation that files create a pathway from coronal to apical to allow irrigant to flow into all of the canal ramifications, which clean the root canal system and optimize clinical success.
Goals of canal preparation include keeping the canal centered in its original position within the root structure and keeping the apical foramen at its original position and size. One of the hallmarks of all the cases illustrated is that the apical foramen has been respected. Specifically, it has not been moved, transported, zipped, and/or altered in any way. The apical foramen might be thought of as the “North Star” in endodontics. Reaching the apical constriction without transporting the canal and eliminating all debris from the canal and providing a tapering funnel from orifice to apex are key canal preparation objectives.
The final prepared canal shape should be large enough to irrigate and obturate, but not so large as to structurally weaken the tooth. For practical purposes, while treatment philosophies differ, the minimum guidelines for final prepared taper should be .04 and the minimum apical diameter a 30 (depending on the initial size of the foramen). Given the advent of controlled-memory nickel titanium, there is little indication for larger tapers, especially in fine three-dimensional apical curvatures. As mentioned, patency is essential because its obtainment means that the clinician can always reach the apex during every phase of treatment, and its loss means that tissue, toxins, and bacteria can remain despite irrigation procedures, especially in the apical third. Apical debris is the harbinger of iatrogenic events. Including, but not limited to, canal transportation, zipping, irrigant extrusion, and a lack of optimal canal cleaning.
Conceptually, root canal system cleansing can be divided into a macro-phase and a micro-phase. Debridement with files is the macro-cleaning. Removal of bacteria and biofilm from the canal walls and dentinal tubules with antimicrobial solutions is the micro-cleaning.
During preparation, it is axiomatic that debris should be removed as quickly as it is produced regardless of whether it is in the chamber or canals. Inserting a nickel- titanium file into a dry canal full of debris in an effort to make apical progress is the harbinger of blocked canals and separated files. This action packs the fine three-dimensional anatomy (apical deltas, fins, cul-de-sacs, isthmuses, etc.) of canals with debris, which can become much harder to remove later in the treatment process. Alternatively, irrigating after the insertion of every file and recapitulation with hand files is ideal to prevent the subsequent buildup of debris, to improve circulation of irrigant apically, and to optimize irrigant refreshment. Today’s rotary files are designed to funnel debris out of the canal in a coronal direction, further facilitating the debris removal.
Irrigation regimens
Irrigation regimens differ widely, but the goal of removal of all organic and inorganic materials, bacteria, biofilm, and toxins from the root canal space is universal. After the canal is prepared, irrigation should be copious. The average volumes of sodium hypochlorite delivered during treatment at the specialty level are approximately 20 cc to 50 cc per case or more for a molar tooth. Volumes of liquid EDTA range anywhere from 5 cc to 10 cc per case or more for a molar tooth.
The utilization of surfactants and enhanced solutions are common at the specialty level. For example, Chlor-Xtra™ (Vista), ChlorCid™ Surf (Ultradent), and HypoPure™ Pro (Kerr Endodontics) are pharmaceutical grade NaOCL solutions that possess surfactants, which reduce solution surface tension and optimize canal wall wetting. Palazzi, et al., 2016, showed that sodium hypochlorite with the addition of surfactant had better penetration into dentinal tubules than sodium hypochlorite alone.4 Surfactants also improve tissue dissolution and oxidizing potential. Sodium hypochlorite solutions are only chemically effective against the organic component of canal debris, and so EDTA, a chelator, is also used to remove the inorganic component of canal debris, including the smear layer.
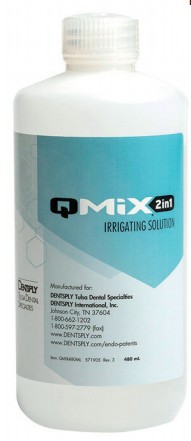
SmearOFF™ (Vista) is a 17% EDTA solution, which also contains surfactants as well as chlorhexidine (a powerful antibacterial solution). A commercial alternative to SmearOFF is QMix. Unlike QMix (which contains chlorhexidine and EDTA), SmearOFF can be mixed with Chlor-Xtra without a rinsing step as no unwanted precipitates are produced by their mixture (Figures 5-7).

Clinicians should know where they are in the canal at all times when irrigating. Recommended needle gauges vary depending on the size of the initial and prepared final canal shape. For the majority of canals, a 27-gauge needle is adequate, but in fine canals, a 31-gauge needle can be appropriate. Needle tip designs can include side-ported and close-ended or side-vented among many possible configurations. The placement of a sodium hypochlorite solution — e.g., Chlor-Xtra to remove bacteria and organic material and SmearOFF to remove the smear layer and inorganic debris using a 27- or 31-gauge needle approximately 2 mm from the apex — ensures penetration of these irrigants into the apical third. Irrigation needles should never be locked by the canal walls. Irrigant delivery is always passive, and the needle is moved gently, slowly, and vertically a few millimeters at a time during extrusion. Under the surgical microscope, irrigant delivery, as described, occurs with precise control.
It is noteworthy that larger syringes (10 cc to 12 cc) require more pressure to extrude the solution relative to a 3 cc syringe. It is imperative that clinicians appreciate how much pressure they are using on the plunger. One unique alternative to plastic syringes is the AutoSyringe (Vista) device, which accepts any luer-lock needle tip and extrudes irrigant at various speeds depending on the setting selected. One author (RM) uses it routinely (Figures 8 and 9).

Irrigant activation
At present there are many ways to deliver and activate irrigation for optimization, including these methods: apical negative pressure (EndoVac, Kerr)5, sonic (EndoActivator, Dentsply), ultrasonic (Endo-Ultra, Vista)6, multisonic (GentleWave®, Sonendo)7, laser-activated (PIPs, Fontana)8, and mechanical (Finishing File, Tun Endodontics) (Bassi Clean Files, Bassi Endo). All of the activation methods named enhance the antibacterial effects of irrigants and result in cleaner canals relative to passive syringe irrigation. In addition, activation removes the accumulation of air bubbles at the apex, which is otherwise known as vapor lock. Air bubbles left at the apex due to passive syringe irrigation diminishes the apical penetration of irrigants.
One author (BG) utilizes a combination of ultrasonic activated and apical negative pressure techniques (EndoVac), and the other author (RM) utilizes ultrasonic energy (EndoUltra). Regardless of which method is utilized to deliver irrigation to the apical third, it is most critical that clinicians activate their irrigation and do not rely simply on cold passive syringe irrigation. While protocols vary, activating each primary irrigant (both SmearOFF and Chlor-Xtra, for example) 3 times in each canal for 20 seconds is a sound clinical strategy (Figures 10-12).


Sonendo’s GentleWave deserves a special mention, as it is unlike the other activation systems available. GentleWave delivers a multisonically activated degassed solution (to remove air bubbles that dissipate energy) with negative-to-neutral pressure delivered via a handpiece over the access in a closed system. The literature basis supporting the system shows impressive cleansing of the root canal systems, but a definitive high-level study on improved healing has not been published to date. Its future application and expansion globally will be interesting to observe.
And finally, the literature is conclusive that placing a post-endodontic coronal seal at the time treatment is completed under the rubber dam is closely associated with endodontic success. Please note, all of the cases illustrated had some form of orifice barrier or buildup placed under the rubber dam at the time of treatment (Figures 13-18).

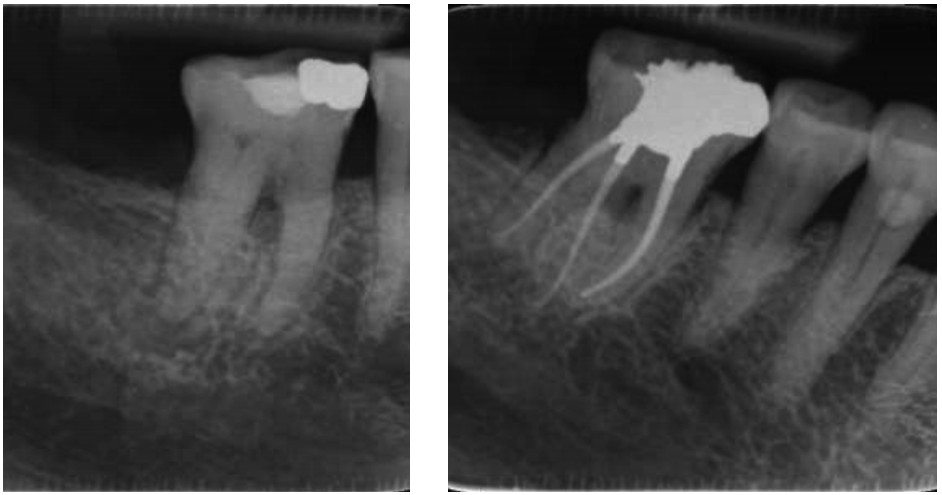


As a starting place, before ever picking up a syringe, the two single greatest ingredients to creating excellent endodontic results are time and comprehensive treatment planning. It is essential that the clinician has enough time to carry out the treatment in a relaxed but productive environment.
Conclusion
This article has stressed literature-based proven treatment principles over a particular manufacturer’s devices or technique recommendations. Emphasis has been placed on an accurate diagnosis, conservative access, patency, minimal taper, activating irrigation, three-dimensional warm obturation, and the placement of a post-endodontic coronal seal at the time of treatment under the rubber dam. We welcome your feedback.
Even with the best of non-surgical endodontic treatment, an endodontist needs to be creative and innovative. Read Dr. Gilbert’s article, “Innovations during a crisis,” here: https://endopracticeus.com/innovations-during-a-crisis/
References
- Gutarts R, Nusstein J, Reader A, Beck M. In vivo debridement efficacy of ultrasonic irrigation following hand-rotary instrumentation in human mandibular molars. J Endod. 2005;31(3):166-170.
- Ee J, El Fayad MI, Johnson BR. Comparison of endodontic diagnosis and treatment planning decisions using cone-beam volumetric tomography versus periapical radiography. J Endod. 2014;40:910-916.
- Neelakantan P, Khan K, Hei Ng GP, et al. Does the Orifice-directed Dentin Conservation Access Design Debride Pulp Chamber and Mesial Root Canal Systems of Mandibular Molars Similar to a Traditional Access Design? J Endod. 2018;44(2):274-279.
- Palazzi F, Blasi A, Mohammadi Z, Del Fabbro M, Estrela C. Penetration of Sodium Hypochlorite Modified with Surfactants into Root Canal Dentin. Braz Dent J. 2016;27(2):208-216.
- Nielsen B, Baumgartner J. Comparison of the EndoVac system to needle irrigation of root canals. J Endod. 2007;33:611-615.
- de Gregorio C, Estevez R, Cisneros R, Heilborn C, Cohenca N. Effect of EDTA sonic and ultrasonic activation on the penetration of sodium hypochlorite into simulated lateral canals: an in vitro study. J Endod. 2009;35(6):891-895.
- Glickman G, Vandrangi P, Khakpour M. Evaluation of root canal debridement using the GentleWave system. J Endod. 2015;41(10);1701-1705.
- Peters OA, Bardsley S, Fong J, Pandher G, Divito E. Disinfection of root canals with photon-initiated photoacoustic streaming. J Endod. 2011’37(7);1008-1012.

 Brett E. Gilbert, DDS, graduated from the University of Maryland Dental School in 2001 and completed his postgraduate training in endodontics from the University of Maryland Dental School in 2003. He is currently a clinical assistant professor in the Department of Endodontics at the University of Illinois-Chicago, College of Dentistry and on staff at Presence Resurrection Medical Center in Chicago. He is a past president of the Illinois Association of Endodontists. Dr. Gilbert is Board-certified, a Diplomate of the American Board of Endodontics. He was named a top ten young dental educator in America by the Seattle Study Club in 2017. In 2019, he was named to Academic Keys Who’s Who in Dentistry Higher Education (WWDHE). Dr. Gilbert lectures nationally and internationally on clinical endodontics. He has a full-time private practice limited to Endodontics in Niles, Illinois. He can be contacted online at
  Richard Mounce, DDS, practices endodontics in Eagle River, Alaska. He has lectured globally and is widely published. He can be reached at